In today’s world finding quality accessories for car modifications that enhance both function and aesthetic without breaking the bank is a pursuit every car enthusiast can relate to. One such accessory, the door visor, offers a blend of utility and style that makes it a sought-after addition to any vehicle. But, with the high costs associated with car mods and the all-too-familiar delays in shipping and transportation, taking the DIY route to install a door visor in your car might just be the solution you’ve been looking for.
Why Choose a Door Visor?
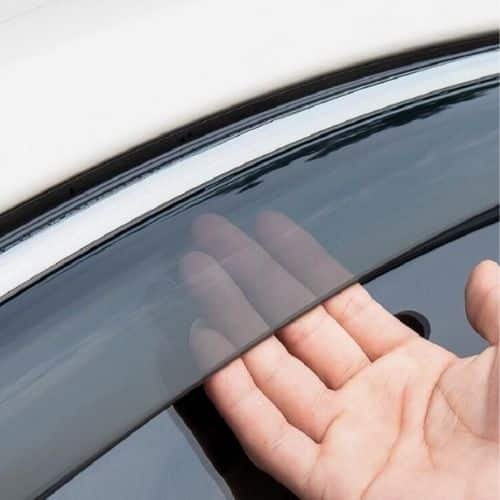
The door visor in car is not just as a mere accessory, but as a pivotal element that bridges functionality with aesthetic appeal. The real value of a door visor emerges from its capability to subtly transform your driving experience. It acts as a guardian against the elements, allowing you to slightly open your windows during rain or intense wind, thereby ensuring that the interior remains comfortable without compromising on ventilation. This function is particularly invaluable, providing both a practical benefit in terms of air circulation and a reduction in wind noise, which contributes to a serene driving atmosphere.
Yet, it’s critical to approach the door visor’s value with a discerning eye. The market is awash with a plenty of options, each varying in quality, durability, and compatibility with specific vehicle models. These variables play a significant role in determining the overall worth of a door visor for your vehicle. A high-quality door visor, made from robust materials like acrylic or polycarbonate, not only endures the test of time but also complements the aesthetic integrity of your vehicle. Conversely, opting for a lower-quality variant might lead to frequent replacements and diminished functionality, undermining the initial purpose of the investment.
Thus, when contemplating the addition of a door visor in a car, consider it an investment in enhancing your driving experience. It’s about striking a balance between practical benefits and the visual appeal it adds to your vehicle. The decision to incorporate a door visor should be informed by a thorough evaluation of these factors, ensuring that it aligns with your expectations and the specific needs of your vehicle.
Selecting the Right Door Visor for Your Vehicle
Navigating the selection of door visors can seem daunting given the multitude of options available. Compatibility ensures that the visor sits perfectly on your car, eliminating any guesswork that might arise from a generic fit. This is why focusing on a door visor tailored for your specific car model is a crucial step. It guarantees not just a seamless installation but also maintains the sleek lines of your vehicle, preserving its aesthetic appeal.
Going deeper into the aspect of quality, the choice of material is non-negotiable. High-quality acrylic or polycarbonate visors stand out for their durability, resilience against the elements, and ability to maintain clarity over time. These materials also boast a level of flexibility that aids in a snug fit while resisting cracking or breaking, challenges often faced with inferior products. The emphasis on quality extends beyond mere longevity; it encompasses the visual harmony of the visor with your vehicle’s design, ensuring that it enhances rather than detracts from its appearance.
Furthermore, the selection process is not just about fitting and materials but also about understanding the functionality that different types of visors offer. Whether it’s enhanced rain protection, reduced wind noise, or a combination of both, the ideal door visor serves to elevate your driving experience by aligning with your specific needs. Therefore, when choosing the right door visor, consider it a merging of compatibility, material excellence, and functional superiority, all aimed at enriching your journey on the road.
Preparing for a Safe and Efficient Installation
To begin on a smooth and successful door visor installation journey, it’s imperative to carefully prepare your workspace and assemble the requisite tools. The foundation of a flawless installation lies in the cleanliness and readiness of both the surface area and the installer. Begin by procuring a clean, lint-free cloth and a bottle of isopropyl alcohol; these will serve as your primary agents in ensuring the door frame is pristine and devoid of any contaminants. It’s not merely about wiping down the surface; it’s about creating an optimal environment for the adhesive to bond effectively.
Next, the adhesive promoter, a critical component often included in your door visor kit, awaits its role. This seemingly small step is pivotal in transforming the surface from merely clean to primed and ready for a strong, lasting adhesion. However, its application demands precision and care; a uniform layer, applied solely where the visor’s adhesive will reside, sets the stage for a bond that’s not just immediate but enduring.
This preparatory phase is as much about setting up your materials as it is about adopting the right mindset. Patience and attention to detail here will not only prevent potential mishaps but also imbue you with the confidence needed as you move forward. By ensuring the area is devoid of grease, dust, and any residue, and by carefully applying the adhesive promoter, you lay down the groundwork for an installation that’s not just efficient but also imbued with the satisfaction of knowing every step has been executed with precision. This preparation, though seemingly humble in its nature, is what elevates the outcome from satisfactory to exceptional.
The Step-by-Step Guide to Installing Your Door Visor
1. Test Fit the Visor: Prior to any commitment with the adhesive, gently place the door visor against its intended spot. This preliminary step is crucial for visualizing the alignment and ensuring the visor perfectly contours to your vehicle’s design.
2. Surface Preparation: Using a clean, lint-free cloth dampened with isopropyl alcohol, meticulously cleanse the application area on the door frame. This phase is about eliminating any trace of contaminants that might compromise the visor’s adhesion. Achieving a spotless surface is foundational for a secure and lasting installation.
3. Adhesive Promoter Application: If your kit includes an adhesive promoter, this is the time for its strategic application. With a focus on precision, apply a uniform layer over the areas that will be in direct contact with the visor’s adhesive. This not only enhances the bond but ensures durability against the elements and time.
4. Peeling the Adhesive Backing: Carefully peel the backing off to reveal the adhesive, taking care not to touch the sticky side. This step is delicate; the integrity of the adhesive is paramount for a steadfast installation.
5. Fitting the Visor: Align the door visor with the prepared area on your vehicle. Once satisfied with its placement, apply steady pressure along the visor’s length to firmly affix it to the door frame. This action requires both gentleness and assertiveness to establish a strong, enduring bond.
6. Securing the Installation: After fitting the visor, it’s advised to leave the windows closed for at least 24 hours. This patience allows the adhesive to cure and bond fully, ensuring the visor remains securely in place, ready to face the rigors of the road.
By carefully following these steps, the installation of your door visor will not only be a testament to your DIY prowess but also a significant enhancement to your driving experience, blending form with function in a harmonious balance.
Addressing Common Installation Challenges and how Motovil helps in overcoming these Challenges.
While installing a door visor is lined with the promise of enhanced aesthetic and functionality, it isn’t without its hurdles. Misalignment and insufficient adhesion emerge as the primary foes in this endeavor. These challenges, however, are not impossible with the right approach and mindset.
Misalignment, the more conspicuous of the two, can deter the visual harmony and functionality of the door visor. This often stems from a haste to complete the process or a misjudgment during the test fit. The key to navigating this challenge is patience and precision. Approach the alignment with an observing eye, allowing for adjustments as needed before the adhesive sets. This is not merely about achieving a visually pleasing outcome but ensuring the visor performs its intended function effectively.

On the other side, insufficient adhesion can compromise the durability of your installation, often resulting from an inadequately prepared surface or incorrect use of the adhesive promoter. Here, diligence in following preparatory steps cannot be overstated. Ensuring the door frame is devoid of contaminants and applying the adhesive promoter as directed are not just steps but assurances of a bond that lasts. These moments of preparation, though seemingly minor, lay the groundwork for a successful installation.
Motovil emerges as a guide for Motor vehicle enthusiasts facing these challenges. By providing detailed guides and facility of offline fitting the parts, Motovil empowers individuals to navigate the installation process.With a click on door visor product, to supporting with the fitting, Motovil addresses common pitfalls, ensuring that your venture into DIY door visor installation is not just an exercise in customization but a testament to self-reliance and the satisfaction of overcoming obstacles with skill and patience.
Ensuring Longevity: Tips for Maintaining Your Door Visor
Maintaining the pristine condition and functionality of your door visor demands a proactive approach to care. Regular upkeep not only preserves its aesthetic appeal but also ensures it continues to serve its purpose effectively. Maintain this ritual with a gentle cleansing, using a soft, damp cloth to wipe away any accumulated dirt, dust, or residue. This simple act, performed periodically, can prevent build-up that might obscure visibility or detract from the visor’s appearance.
In the pursuit of cleanliness, it’s imperative to steer clear of harsh chemicals or rough materials. Such agents can inflict scratches or cause cloudiness, diminishing the visor’s clarity and resilience. A mild soap diluted in water can serve as a safe cleaning solution. After cleaning, a soft, dry cloth can be used to wipe the visor dry, ensuring no water spots are left behind to block its transparency.
Beyond the surface care, vigilance in monitoring the visor for any signs of wear, such as cracks or loosening, is crucial. Early detection of these issues can pave the way for timely interventions, whether it be a simple adjustment or a more involved repair. Such attentiveness not only extends the visor’s lifespan but also safeguards its functionality against the rigors of daily use.
Adhering to these maintenance tips encapsulates a commitment to preserving the integrity and performance of your door visor. It’s a testament to the notion that the longevity of car accessories is as much a product of ongoing care as it is of initial quality. Through consistent and mindful maintenance, your door visor remains a reliable companion, ensuring your driving experience is unaffected by the elements and your vehicle’s aesthetic appeal endures.
The Benefits of Your Door Visor DIY Installation
Embracing the DIY route to install a door visor stands as a testament to your dedication to not just enhancing your vehicle, but also to mastering a new skill set. The journey from selection to installation culminates in a deeper connection with your car, fostering a sense of pride and accomplishment that’s unparalleled. This isn’t merely about the savings on installation costs or the avoidance of waiting periods; it’s about the enrichment of your automotive experience on multiple levels.
The door visor, once installed, serves as a constant reminder of your capability to take control, to innovate, and to personalize. It becomes more than an accessory; it’s a symbol of your ability to blend functionality with aesthetics, all while navigating the challenges of a DIY project. The satisfaction derived from this process is multifaceted, ranging from the immediate visual and practical enhancements to the long-term benefits of increased comfort and an optimized driving environment.
Moreover, this venture into self-installation opens up new avenues for future projects, building a foundation of confidence and skills that can be applied to a wide array of car modifications. It demystifies the process of vehicle customization, making it accessible and achievable for anyone with the willingness to learn and the patience to execute with care.
Ultimately, the decision to install your door visor is an investment in your vehicle and yourself. It’s a step towards self-reliance in the world of car customization, empowering you to make informed choices and execute them with precision. The benefits reaped from this DIY installation extend beyond the tangible; they resonate with a sense of personal growth and the joy of a driving experience that’s uniquely yours. Moreover, if you face any challenges while installation, Motovil offers 24*7 online and offline support with the fitment.